Introduction
A common problem on rendered exterior walls starts at a very small detail. Imagine a window head, balcony edge, or lower wall edge finished without a clear drip point. When rain reaches the edge, some of the water can wrap around the underside instead of dropping clear. Over time, this may leave dark run marks, dirty streaks, or repeatedly wet areas below the edge.
This is where drip edge trim becomes useful. Rather than relying only on the shape of the render, the profile creates a controlled edge where water can separate from the surface and fall away. It also gives the installer a straight line to finish against.
For exterior wall work, the important questions are simple: where should the profile be used, which type fits the detail, and how should it be embedded into the mortar or render system? This guide explains those points without mixing wall drip profiles with roofing drip edges.
What Is Drip Edge Trim?
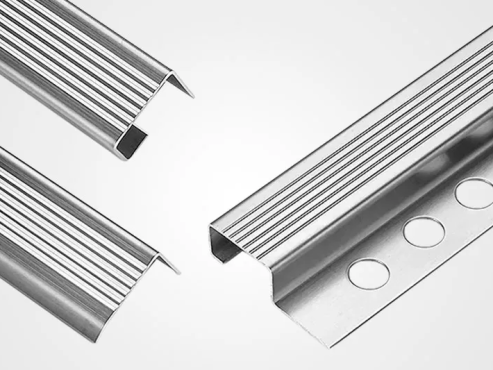
Drip edge trim is a finishing profile used at exposed edges of plastered or rendered walls. It is normally embedded into the base coat or mortar. The profile forms a projecting drip point, while its perforated or mesh wing becomes part of the wall finish.
The purpose is not to make the wall waterproof by itself. Instead, the trim helps control surface runoff at an edge. Water reaches the projecting nose, breaks away from the underside, and drops rather than continuing back toward the wall face or opening.
On a finished facade, most of the fixing wing is hidden. What remains visible is usually a narrow, straight edge or drip nose. For this reason, profile selection affects both drainage detail and final appearance.
Where Is Drip Edge Trim Used?
A drip detail is most useful where rainwater reaches a horizontal edge or where render needs a defined lower termination. Typical locations include window and door heads, balcony or soffit edges, projecting facade details, and the bottom edge of a rendered wall.
The exact position matters. A profile above an opening has a different job from one at the bottom of a wall. The first helps stop water from tracking along an underside toward the opening. The second creates a lower finish line and encourages runoff to drop clear of the surface below.
Before ordering, check the wall build-up, render thickness, edge geometry, and the direction in which water is expected to move. A profile that fits the plaster depth but places the drip nose too close to the wall may not create the intended detail.
Common Types of Drip Edge Trim and Their Functions
There is no single universal naming system for every drip profile. In practice, it is more useful to distinguish drip edge trim by installation position and the job it needs to perform.
1. Window Head and Horizontal Drip Edge Trim
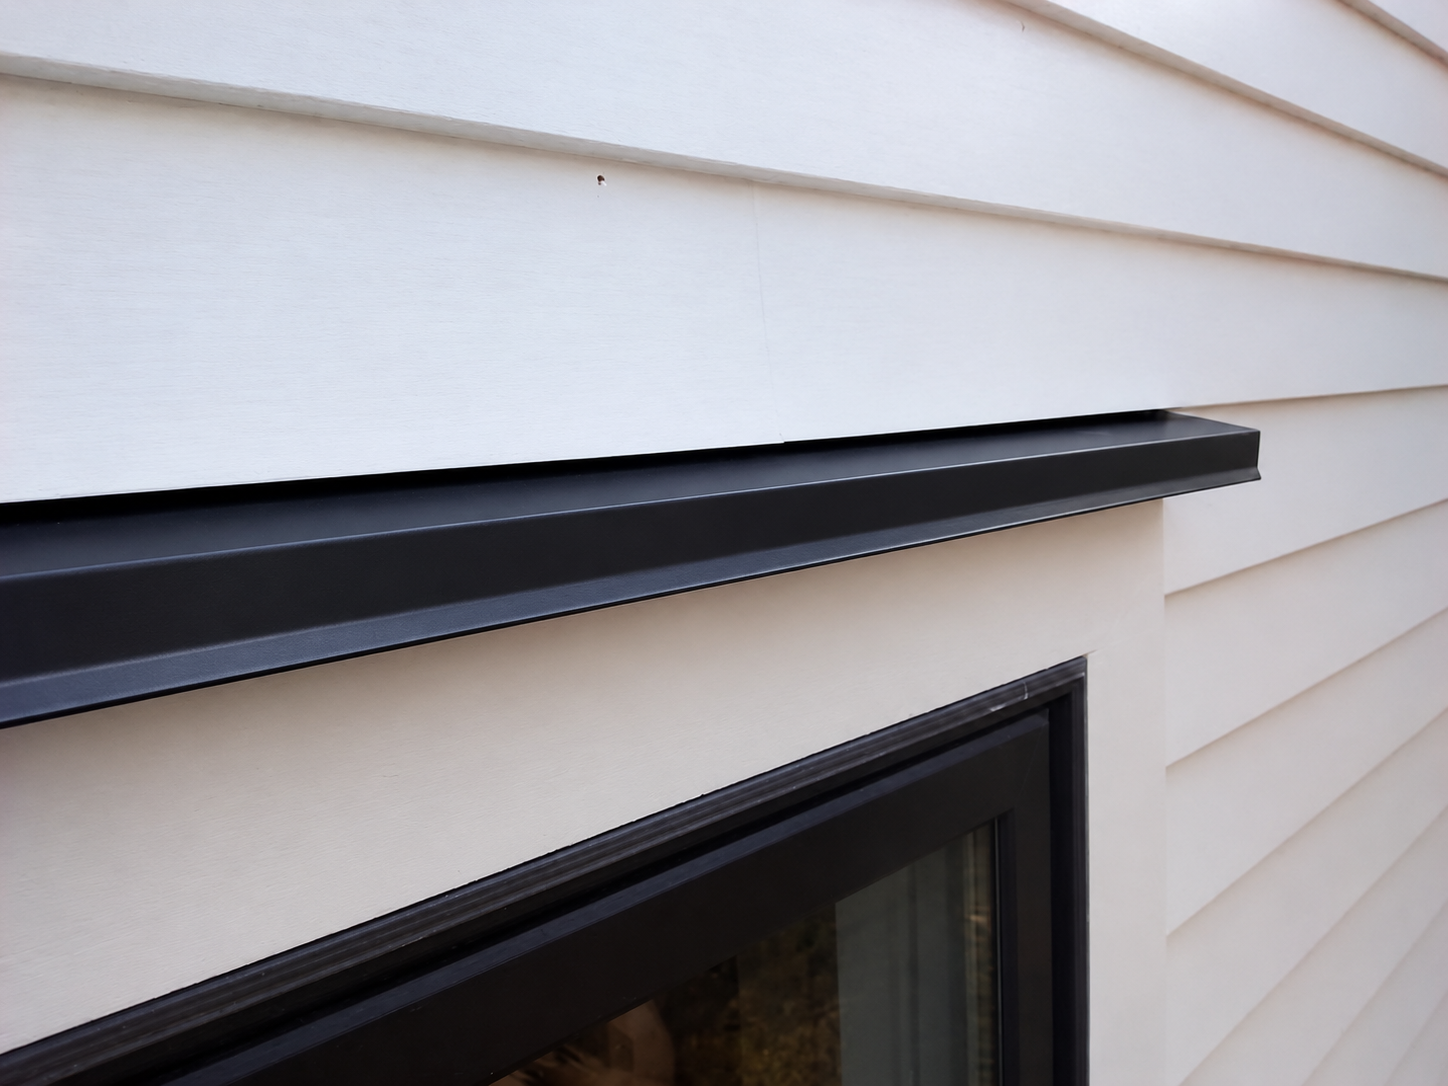
This type is installed along horizontal edges above openings or similar details. Common positions include window heads, door heads, small projections, and the underside of a rendered edge.
Its main feature is a downward or projecting drip nose. As water moves across the outer surface and reaches the edge, the nose provides a point where the water can break away. This helps reduce water tracking back across the underside.
A horizontal profile usually has a perforated flange, mesh wing, or another surface designed to be embedded into the render coat. Once finished, the profile also helps create a straight line along the head of the opening.
This type is a practical choice when the primary requirement is a clean horizontal termination with a defined drip point.
2. Balcony and Soffit Drip Edge Trim

Balcony undersides, soffits, and other projecting wall details can also need a drip edge. In these positions, the trim is placed near the outer edge so that runoff does not continue along the underside toward the wall.
The profile may look similar to a window-head drip profile, and in some systems the same profile can be used in both locations. The difference is mainly the surrounding construction and the amount of exposed horizontal surface feeding water toward the edge.
For wider projections, alignment becomes especially important. The drip nose should form a continuous line, and the render around it should not cover the part of the profile that is intended to create the break in the water path.
When a soffit or projecting edge changes direction, the joint also needs careful cutting. A neat corner prevents an obvious break in the finished line and keeps the drip detail continuous.
3. Bottom Edge Drip Trim
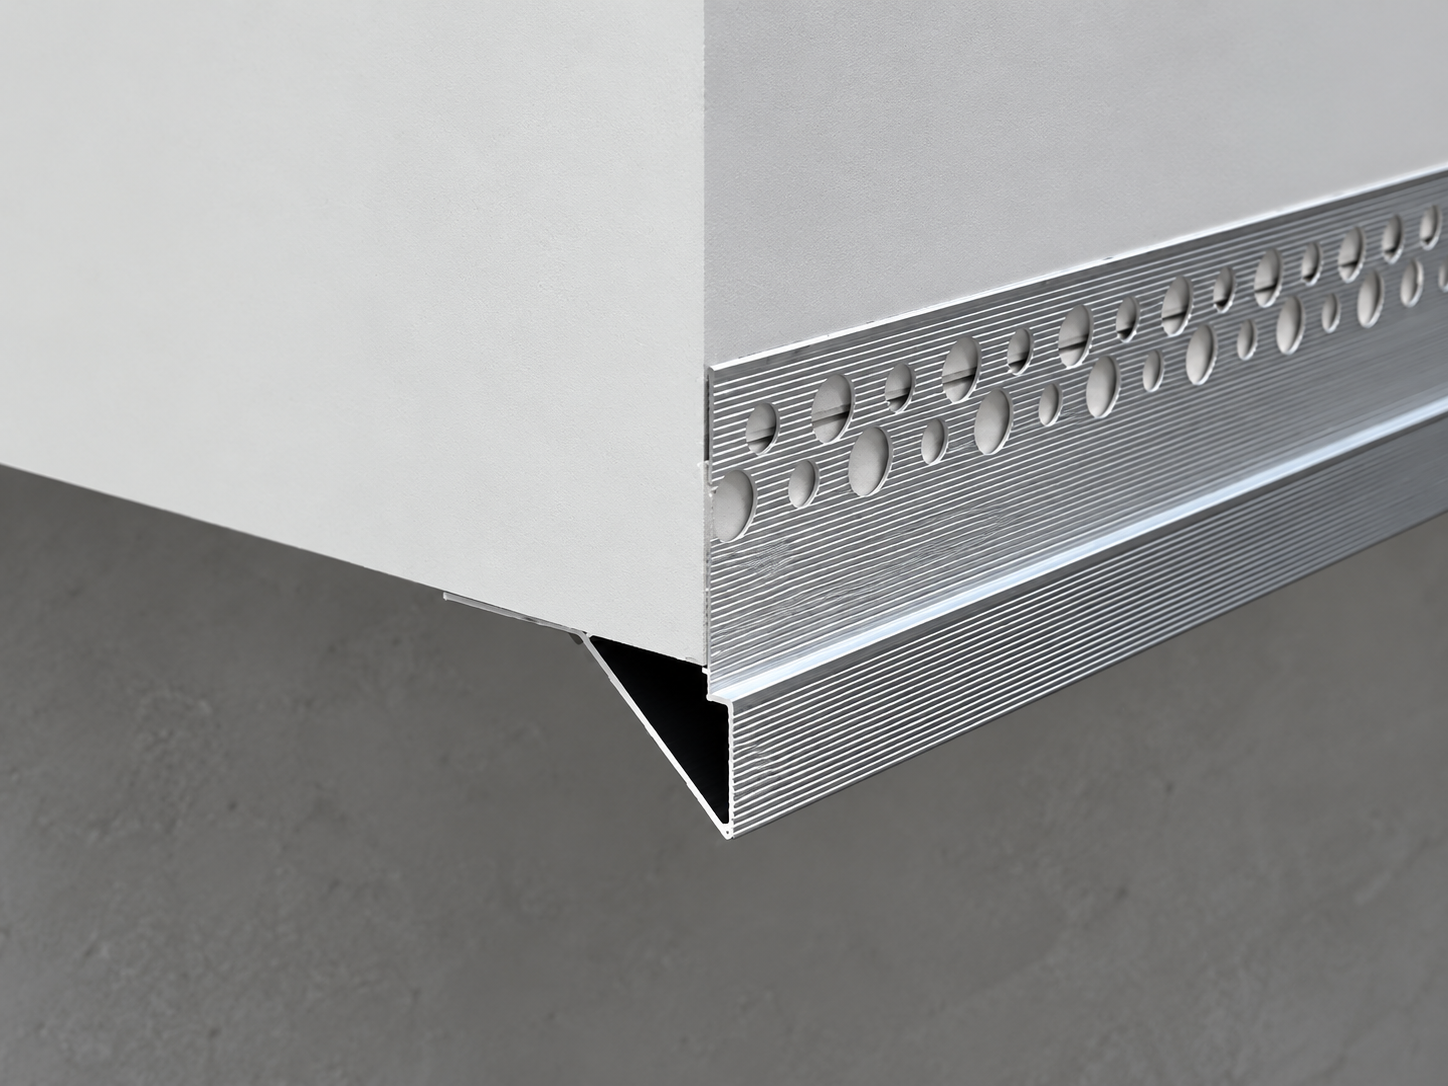
Bottom edge drip trim is used where an exterior render system finishes at the lower part of a wall or above another facade section. It is also commonly described as a bellcast or render drip profile.
Unlike a window-head detail, this profile serves two jobs at the same time. It gives the render a defined lower stopping edge and creates a projecting point from which rainwater can fall clear.
This makes bottom edge drip trim useful where a plain stop edge would leave water running directly onto the surface below. The profile can also help the installer maintain a consistent lower line across a long elevation.
The profile depth should match the intended render build-up. If the bead is too shallow or too deep for the wall finish, it becomes harder to keep the surface flat and the drip nose correctly exposed.
Are These Always Three Different Products?
Not necessarily. A window-head and balcony profile can sometimes use the same basic profile. The application name changes because the installation location changes.
Bottom edge profiles are usually easier to distinguish because their shape also creates a lower termination for the render. For project purchasing, it is therefore better to compare profile drawings, render depth, wing design, and drip position instead of relying only on product names.
How to Choose the Right Drip Edge Trim
The correct profile should suit the wall detail before it suits the catalogue description. Start with the section drawing or actual site edge and identify where the water needs to leave the surface.
Then check the thickness of the mortar, plaster, or render layer. The profile has to sit at the correct depth so the finished wall can be ruled and smoothed without burying the drip nose or leaving the trim standing proud.
Also consider how the trim will be embedded. Perforated wings allow mortar to pass through the openings and lock around the profile. Profiles with mesh wings spread the connection across a wider area of the base coat. The appropriate option depends on the specified wall system.
For long elevations, straightness and joint consistency are just as important as profile shape. We recommend confirming one sample detail before bulk installation, especially where window heads, soffits, corners, and lower wall edges use different profiles.
How to Install Drip Edge Trim
The following method matches a mortar-bedded profile with a perforated fixing wing. The exact mortar or render system should still follow the project specification.
Step 1: Apply Mortar to the Wall
Apply mortar evenly to the wall where the profile will be installed. The mortar should provide continuous support behind the fixing wing rather than leaving the profile unsupported at random points.
Keep the installation line clear and check the position before placing the trim. This is especially important on long horizontal runs, because a small error at the start can become more visible across the finished wall.
Step 2: Position the Drip Edge Trim
Place the drip edge trim onto the prepared mortar. Make sure the drip nose faces the correct direction and sits at the intended edge of the finished surface.
At this stage, focus on alignment. The profile should follow the required horizontal or edge line before it is fully pressed into the mortar.
Step 3: Cut and Join Corners at 45 Degrees
Where the drip edge trim meets at a corner, cut the adjoining pieces at 45 degrees and bring them together carefully.
A clean mitre makes the finished corner look continuous and reduces the need to build up excess mortar around an untidy joint. Before pressing the pieces firmly into place, dry-fit the corner and check that the visible drip edges meet evenly.
Step 4: Press the Drip Edge Trim Firmly into Place
Press the profile into the mortar so that it sits tight to the wall and follows the required line. Apply pressure along the length instead of forcing only one point.
Check the face and edge again after pressing. The goal is to keep the profile straight while leaving enough mortar around the fixing wing to hold it securely within the wall finish.
Step 5: Apply Mortar Over the Perforated Flange and Smooth It
Apply additional mortar over the perforated fixing area. Work the mortar through the openings so the wing becomes embedded rather than simply covered on the surface.
Smooth the area into the surrounding wall coat while keeping the drip nose clear. The finished render should meet the designed edge of the profile without blocking the part that needs to shed water.
Common Drip Edge Trim Installation Mistakes
Most installation problems are not caused by the profile itself. They usually come from position, alignment, or incomplete embedding.
- Installing the drip edge in the wrong direction. The projecting nose must face the direction that allows water to break away from the surface.
- Using a profile that does not match the render depth. A poor depth match can make the finish uneven or leave the working edge in the wrong position.
- Leaving the trim out of line. This becomes very visible above windows, across balcony edges, and along the bottom of a facade.
- Making rough corner joints. Poorly cut corners interrupt the drip line and usually require more finishing work.
- Failing to embed the fixing wing. Mortar needs to pass through or fully cover the designed fixing area so the profile becomes integrated with the wall coat.
- Covering the drip nose with finish material. The projecting edge must remain able to form the intended water break.
A short site check before the mortar sets can prevent most of these issues. Look along the trim from both ends, confirm the corner joints, and make sure the visible edge remains clean.
What to Check Before Ordering Drip Edge Trim
For a small repair, profile selection may be straightforward. For a commercial or multi-unit project, ordering without checking the wall section can create unnecessary variation on site.
Confirm the intended location of each profile and separate quantities for window heads, balcony or soffit details, and bottom wall terminations. If different render depths are used on the same project, do not assume one profile size will suit every elevation.
It is also useful to review how lengths will meet at corners and along long runs. The installer should know where joints are acceptable and where a continuous visual line is especially important.
As a manufacturer, we recommend approving the profile cross-section together with the wall detail before placing a bulk order. A simple section check is more useful than choosing only from a product name or photograph.
Frequently Asked Questions
Where should drip edge trim be installed?
Drip edge trim is normally installed where an exterior rendered surface needs a controlled water break. Common positions include window and door heads, balcony or soffit edges, projecting facade details, and the bottom termination of rendered walls. The correct location depends on the wall section and the expected path of rainwater.
What is the difference between drip edge trim and normal plaster trim?
A normal plaster trim may mainly create a straight edge, stop, or corner. Drip edge trim also includes a projecting detail designed to help water separate from the surface. Some profiles perform both functions, such as a bottom render trim that creates a neat termination while also forming a drip point.
Can drip edge trim be used at the bottom of an exterior wall?
Yes. A bottom edge drip trim can be used where exterior render finishes at the lower part of a wall. Its shape provides a defined lower edge and helps runoff drop clear rather than following the underside. The profile depth and exact position should match the specified render and wall construction.
How do you join drip edge trim at a corner?
For the installation method described in this guide, adjoining drip edge trim can be cut at 45 degrees and fitted together as a mitred joint. Dry-fit both pieces first, check that the visible drip edges align, then bed and press the profiles into the mortar before covering the fixing wings.
Does drip edge trim make a wall waterproof?
No. Drip edge trim is a drainage and finishing detail, not a complete waterproofing system. It helps manage surface runoff at exposed edges. The wall still depends on the specified render, substrate preparation, joints, membranes, flashings, sealants, and other moisture-control details required by the project.
Conclusion
Drip edge trim is a small profile, but its position has a direct effect on how an exposed rendered edge handles runoff and how cleanly that edge can be finished. The best result comes from selecting the profile from the actual wall section rather than treating every drip detail as the same.
Before installation, confirm the render depth, water direction, edge position, and corner treatment. When these details are clear, drip edge trim can be integrated into the mortar with a simple installation sequence and a consistent finish across the project.